


How to Install a VPN on Your iPhone
Once you’ve downloaded a VPN, you can connect to the network using your iPhone. The process is simple. The VPN app can be found in the App Store, located at the bottom of the screen. From there, you can search for the desired app and select it. After you’ve selected a VPN, you need to confirm its installation by entering a passcode or Touch ID or Face ID. Then, just allow the VPN to add its VPN configuration.
Once you’ve selected a VPN, you should enable the automatic configuration feature. You’ll be prompted to input your phone’s passcode. After that, you can simply select the VPN and choose which servers to connect to. If you choose to use a multiple-connections option, you’ll be able to access all of the servers that are configured. You don’t have to create any additional configurations or manually go into the settings app.
If you want to disable the VPN, you can disable it in the Settings app. If you don’t want to use a VPN, you can also delete the profile. Just be careful though: an installed VPN may prevent you from switching it off with the toggle, and will automatically enable when you need to use the data connection. To delete a profile, you’ll need to select the “X” button and tap “Delete Profile.”
After installing a VPN, you can enable it in the Settings app. You can then change its settings by switching it on and off as you need. If you’re connecting to multiple VPNs, you can select a different one. You can also manage multiple VPNs from the Settings app. However, if you’ve already installed a VPN, you can’t delete the profile. Besides, deleting the VPN profile may not be possible because it will keep automatically turning on whenever you need the data connection.
Once you’ve installed the VPN, you should first install the IKEv2 certificate. If you haven’t done this, then you need to install it. This certificate is the first step in installing a VPN on your iPhone. You should also be aware that you’ll need to add a certificate in order to connect to a VPN. Adding the IKEv2 certificate will help your iPhone stay safe when you access websites from abroad.
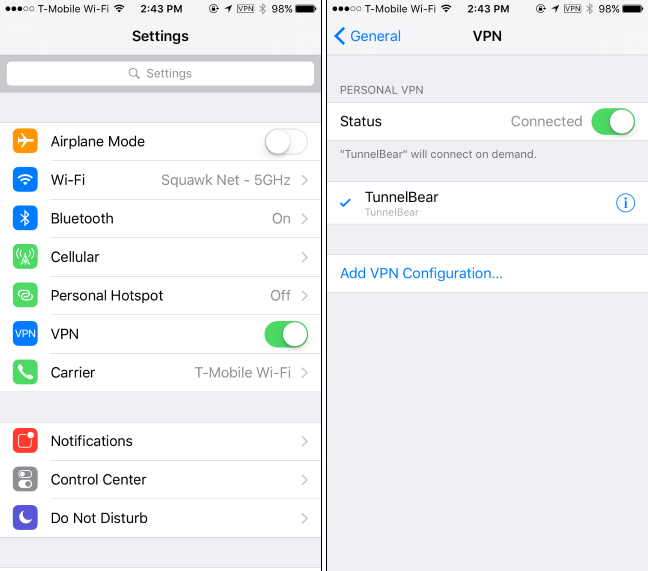
In order to use a VPN on your iPhone, you need to first install the IKEv2 certificate. Then, you need to enable VPN on your iPhone. You can do this by going to Settings > General and then to the VPN. You’ll need to enter the password twice to enable the VPN. Once you’ve activated the VPN, you need to go into the VPN settings and select the type.
Once you’ve installed the VPN on your iPhone, you’ll need to configure it. You can use a free VPN service, or you can purchase a paid subscription to use it. This is a good way to access blocked websites. You’ll need to install the VPN software before you can use it on your iPhone. Then, you’ll need to install the IKEv2 certificate. This is easy to do and should be done by the manufacturer’s documentation.
When you’re done setting up your VPN, make sure you know how to manage it. The VPN app allows you to manage the configurations of multiple VPNs. If you want to delete an entire VPN, just delete its profile. Alternatively, you can disable the VPN. Once you’ve disabled it, you can access its settings. The app will then automatically enable VPN when you need a data connection. Then, you’re ready to go.
If you’re using a VPN for corporate purposes or to access blocked content, you can install it manually. To do so, you need to have an IKEv2 certificate. To install IKEv2 on an iPhone, you need to add the VPN configuration. You can find this in Settings. To enable the VPN, navigate to the VPN provider’s site. After that, enter the VPN provider name. Then, press “Add” to your iOS device.

 | ExpressVPN Fast, anonymous browsing all over the world | |
 | NordVPN Enjoy online privacy and security with a reliable VPN | |
 | Cyber Ghost Browse anonymously with reliable security | |
 | SurfShark Affordable and reliable VPN for secure browsing | |
 | ZenMate Experience the internet anonymously | |
Purevpn Keep your data secure with a VPN built for privacy |