

If you are new to VPN services and have trouble getting started, this tutorial will teach you how to create a VPN server in your Mac. The VPN server is an application that enables users to connect to the Internet from a dial-up modem. It is very easy to install, and will work with most computers. You’ll need a Mac running OS X or a Windows operating system, and the software comes preconfigured for most of these devices.
Once you’ve installed the program, you’ll need to set up your VPN server. There are several options you can choose from, including a different user account for each user. To ensure that you’ll never have to share an account with someone else, you’ll want to enable DHCP. If you don’t have a Mac, you can also rent out a virtual private server from a cloud computing service provider.
To create a VPN server on your Mac, you need to change your router’s firmware. First, you need to download the latest version of the Linux operating system. You’ll need to flash the router’s firmware to install the VPN server. You can use the DD-WRT firmware to do this, but it will take time. ExpressVPN is a much better choice. Just follow the same steps described above, and you’ll have a working VPN server in no time!
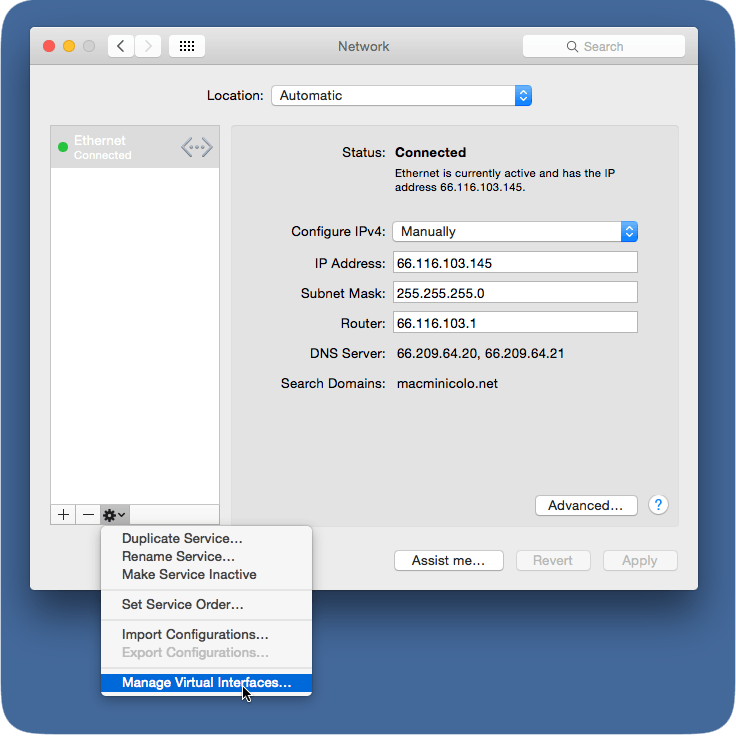
Once you’ve done this, you’ll have to configure the VPN server. Select the IP address range that you want to use, which is higher than the range of IPs that your router uses. Then, set the access protocol for your VPN server. Now, you can connect to your VPN server. This is the most basic step in creating a VPN server. If you want to get more advanced, you can rent a virtual private server with cloud computing service providers.
After enabling the VPN server, you need to configure it for both the incoming and outgoing connections. The VPN server needs to be configured with a high-order range of IP addresses to avoid clashes with your router. You can find these settings in your router’s settings page. You should also enable the protocols that are needed for your network. It’s important to remember that when you connect to your VPN, the network resources must be available for your client.
Once you’ve configured the LAN, you’re ready to add VPN servers. You can choose a high-order range of IP addresses for the VPN server. Make sure that your VPN server has an IP address that does not conflict with the IP of your router. To create a VPN, you need to select the DHCP settings of your router and allow incoming connections. After that, you should click the Connect button to open the VPN server.
Once you’ve configured the LAN, you need to configure the VPN server for the LAN. You’ll need to enter the IP address of the VPN server. If you’re using a router, make sure you enable it for incoming connections. You can also use a router to set up a LAN and a VPN. A LAN connection is a common name for a computer. This is the most basic way to create a VPN.
Next, you need to set up a VPN server. To do this, you’ll need to make sure your network is accessible. Once the VPN server is setup, you need to enable the LAN settings. You’ll need to select the LAN settings and the LAN protocols for the LAN. Then, click Allow. After that, you’ll need to enable the LAN resource. Once you’ve completed these steps, you’re ready to start creating a VPN server.
Once you’ve configured your network, you’ll need to configure the router for a VPN. You’ll need to enable DHCP settings on the router to host the VPN server. You can then select user accounts for the VPN server. Once you’ve configured the firewall, you’ll need to set the protocol for incoming connections. After you’ve setup the NAT, you’re ready to configure a VPN on your router.

 | ExpressVPN Fast, anonymous browsing all over the world | |
 | NordVPN Enjoy online privacy and security with a reliable VPN | |
 | Cyber Ghost Browse anonymously with reliable security | |
 | SurfShark Affordable and reliable VPN for secure browsing | |
 | ZenMate Experience the internet anonymously | |
Purevpn Keep your data secure with a VPN built for privacy |